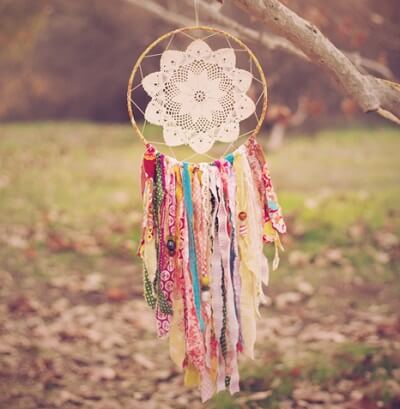
There is no better reminder to dream big than a dreamcatcher. While serving as both a symbol of the imagination as well as a guardian to ward off evil spirits and energies, the dreamcatcher is also a beautiful décor piece to hang on or above your bed. This simple but effective décor is the perfect way to add that special touch to make your room feel more whimsical and romantic. However, store-bought dreamcatchers can get expensive or, often, their designs aren’t the perfect fit for your space. So, why not make your own? DIY dreamcatchers are not only effortless to make but also allow you to customize. We loved what Pattern Revolution did with her dreamcatcher! See her examples below.
Supplies Needed:
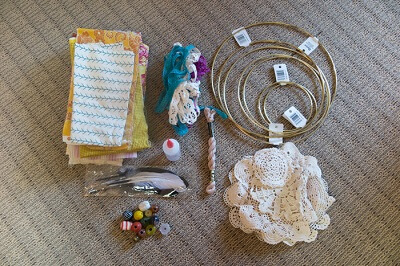
- A fabric lace doily
- A metal or wood macramé hoop (its diameter should be about 2 inches larger than your doily)
- Yarn, string, fabric scraps, ribbons, etc.
- Scissors
- Embellishments (flowers, feathers, gems, etc.)
- Glue
Instructions:
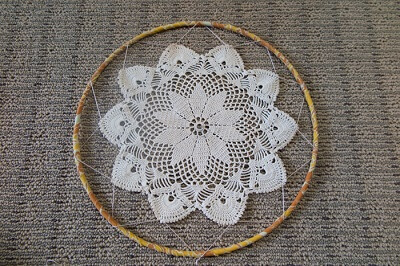
- To begin making your DIY dreamcatcher, take your yarn or string of choice and tie it onto the hoop. Then, tightly wrap the hoop with your string, wrapping it close enough together to ensure none of the hoop is visible. Make sure your piece of string is long enough to wrap around your entire hoop. However, if you do run out of string, you can always secure the loose end onto the hoop and then tie on a new piece of string. Continue wrapping until you have covered the entire length of the hoop. Secure with a knot to finish.
-

Photo Courtesy of Pattern Revolution Once your hoop is complete, lay it down on your table and place the lace doily in the center. You are now going to attach your doily to your hoop. Start by attaching a piece of string to your hoop. Then, weave the string back and forth between the hoop and the holes on the edge of the lace doily. When weaving, do not pull the string too tightly as you want to make sure that the lace doily will remain centered. Secure with a knot to finish.
- Afterward, glue on any desired embellishments such as gems or flowers. You can use these decorations to help cover up any knots or messy portions of your string work from steps one and two. Opt for smaller sized embellishments as you do not want to cover up too much of the doily. Small rhinestones work best. Let any glued-on embellishments completely dry before proceeding to the next step.
-

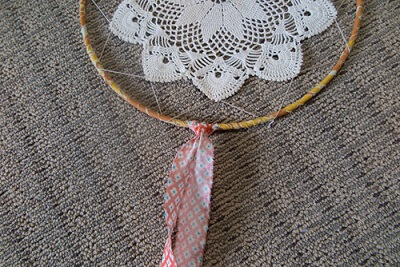
Photo Courtesy of Pattern Revolution Next, tie string, yarn, ribbons, or fabric scraps along the base of the ring. You can keep them all the same length or vary it for a more interesting look. For whichever material you choose, you can coordinate the colors to match your bedroom or favorite colors.
- Finish off the bottom of your dreamcatcher by adding any beads, feathers, or other finishing touches.
- Lastly, take a piece of string and loop it through the top of your dreamcatcher. You can make this loop as small or large as you wish depending on how far you want it to hang. Secure with a knot to complete. Hang as desired.
In Pinspiration’s Main Studio, you can create your own dreamcatcher with ease. With a variety of ribbons, embellishments, and all necessary supplies provided, Pinspiration has got you covered for all of your DIY dreamcatcher needs – plus, let us worry about the mess and clean-up! All you need to think about is where you’re going to display it – book an appointment at pinspiration.com