DIY candles are not only easy to make but also give you the opportunity to customize design, sent, shape, size, and embellishments! Here are instructions on how to make your very own custom candle from scratch using soy flakes.
 Supplies Needed:
 Supplies Needed:
- A candle vessel (jars work great!)
- A wick
- Glue or wick sticker (Loctite Glass Glue is a good option for adhering to glass)
- Soy wax flakes
- Wax color dye (like these from CANDLEWIC)
- Scented oils (essential oils work great!)
- Craft stick and clothespin
- Jar decorations such as jewels, beads, ribbon, buttons, etc. (optional)
Instructions:
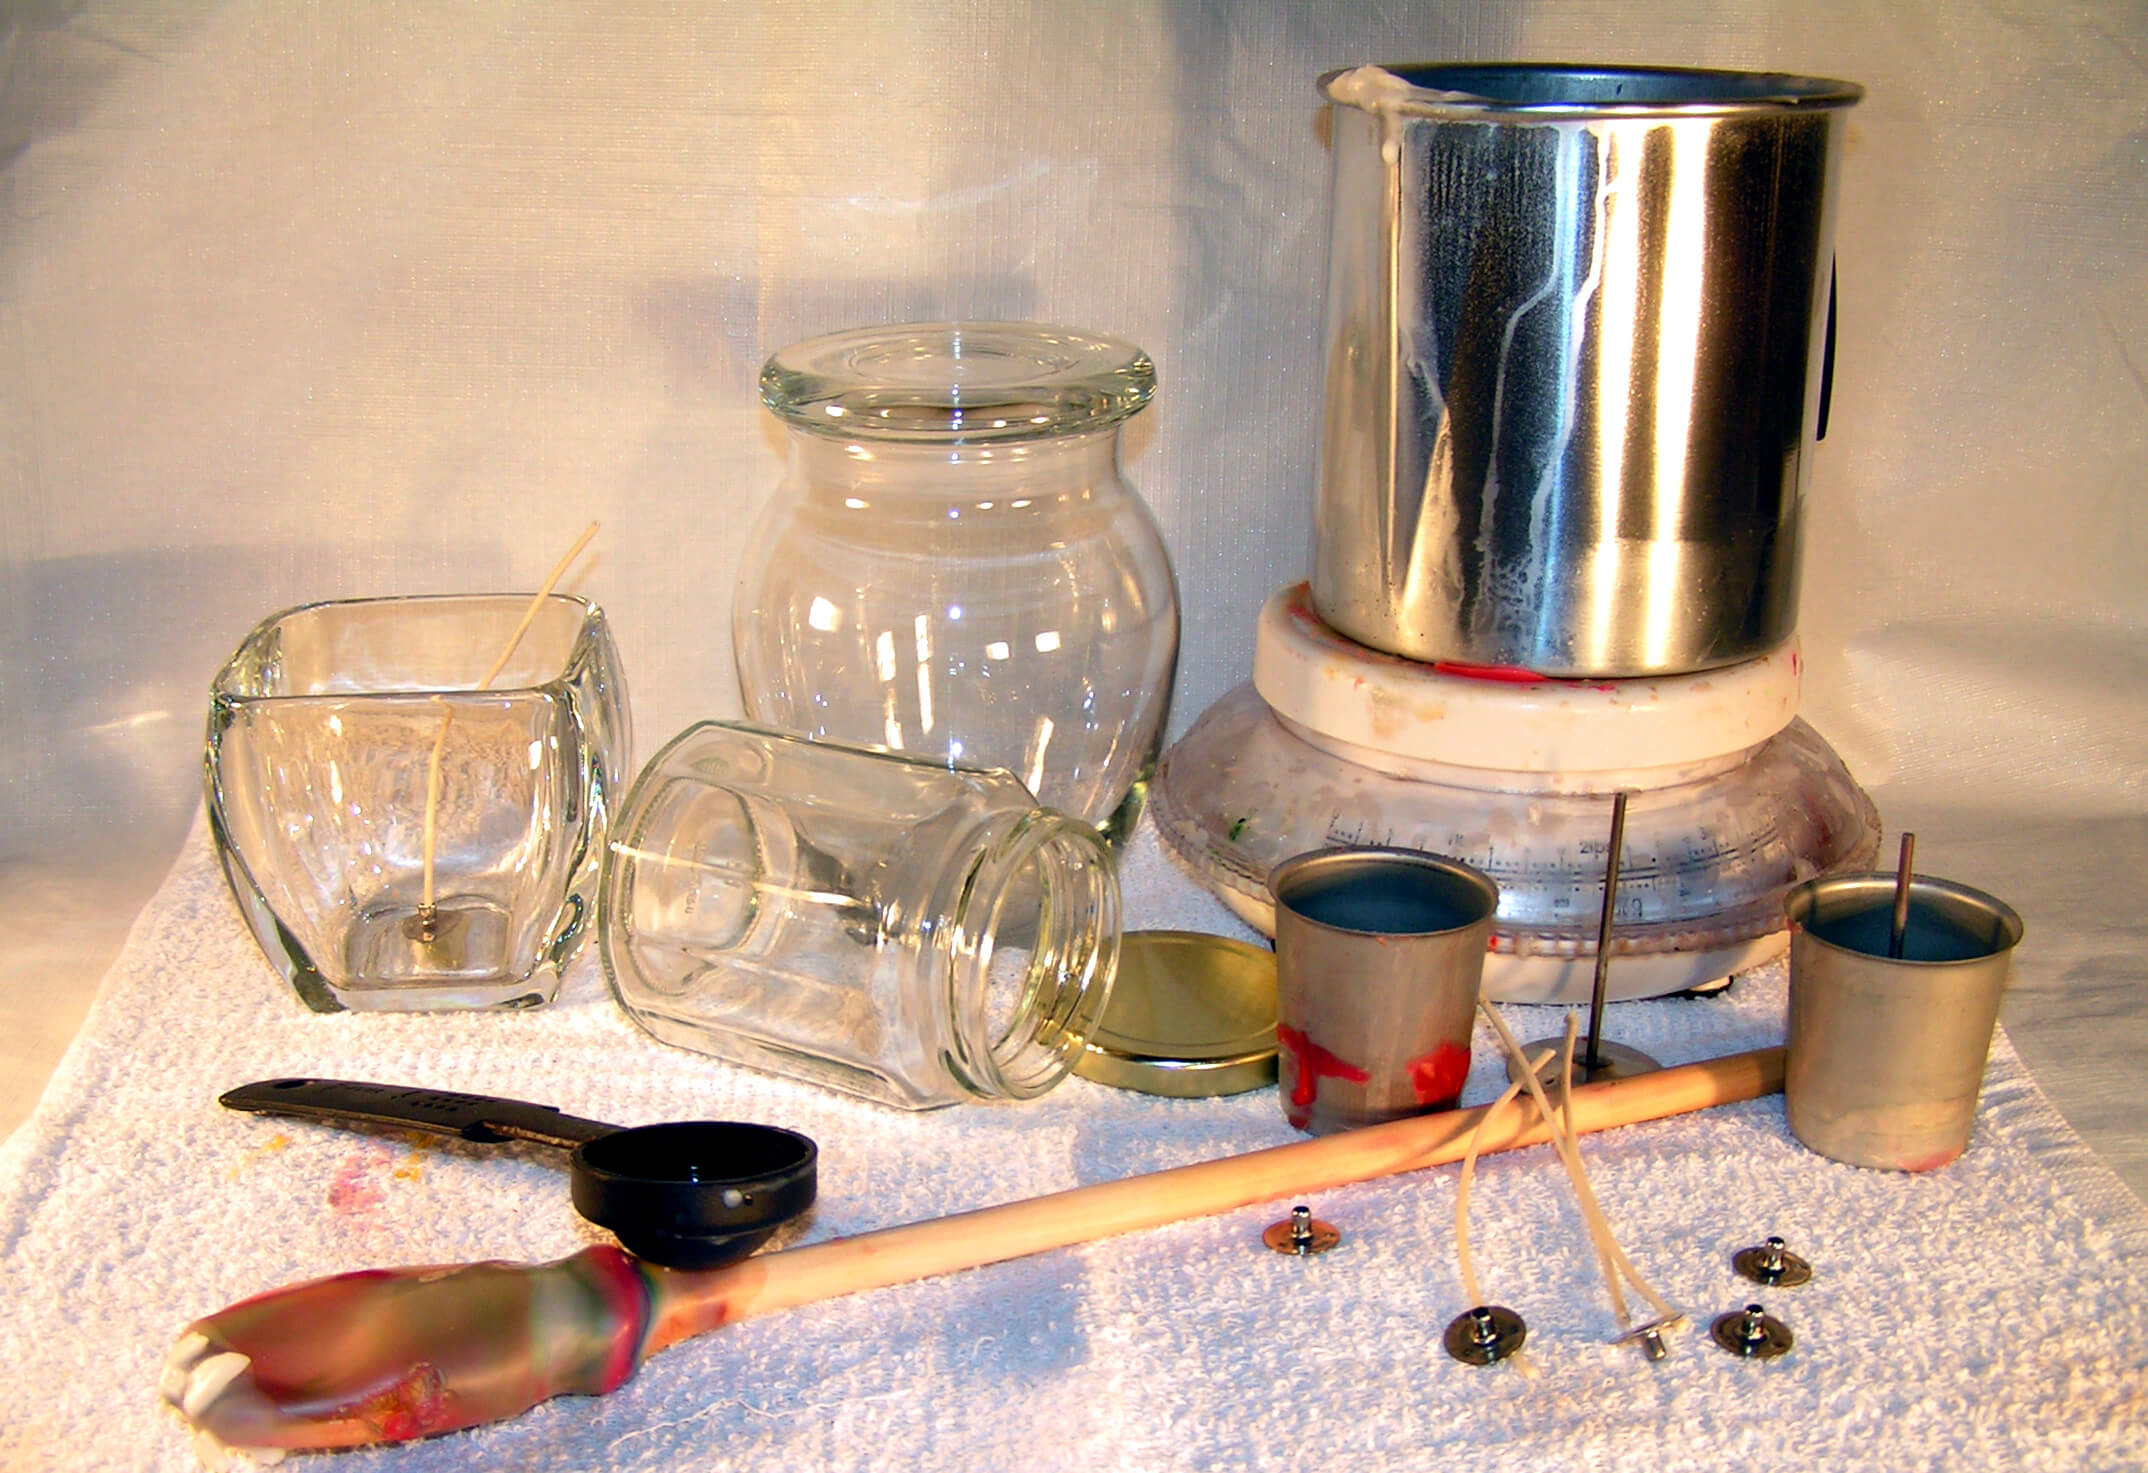
- Pick out your jar or candle vessel. You preferably want to choose a container that is glass or metal as plastic might warp due to the hot wax. If you decide to select a metal vessel, be careful when pouring in the hot wax as the container will get hot.
- Next, cut the wick so that at least an inch sticks out the top of the vessel when placed inside.
- Glue or stick down the wick to the center bottom of your jar. Be sure to press the wick base down really hard so it adheres. You need the wick to be completely secured down or it will float once the liquid wax is poured in.
 While the glue dries/wick sticker adheres, decorate your jar. You can use any variety of jar decorations such as markers, paints, ribbons, gems, seashells, sticker labels, etc. to personalize your candle. Remember to position any 3-D decorations far away from where the flame will be. You don’t want anything to catch fire when you light your creation!
- Once you are finished decorating, fill your jar with soy wax flakes to the very top and then dump out into either a wax melter, if available, or a microwave-safe dish. Repeat one more time as you will need twice that amount to get enough melted wax to fill the jar.
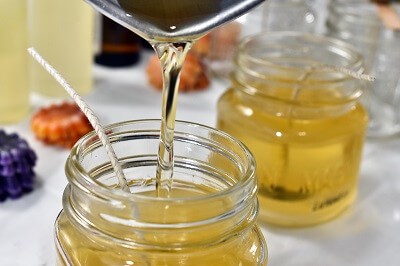
- Melt the wax either by turning on the wax melter, or microwaving your soy flakes. If you are using the microwave, it will typically take between 2 and 4 minutes until your wax liquifies depending on how much wax you are using. After 2 minutes, heat in 30-second intervals until it is melted. Once it is liquid, do not microwave any further as the wax will burn.
- After all of your wax is thoroughly melted, pick out your wax color and scent(s). Feel free to mix a variety of colors and scents to create your own unique combination.
- Add in your colors and scent(s) to the melted wax. You should aim for around 4-5 drops of each scent depending on how strong of a fragrance you want. When the wax hardens, the color will be a slightly lighter shade than it will appear when the wax is hot – so once you reach your desired shade, add a bit extra. thoroughly mix everything together!
- Carefully pour your hot wax mixture into your vessel, being careful to not disturb the wick. If the wick shifts during the pouring process, move it back into an upright position. In order to keep this position during the setting process, use the craft stick and/or clothespin (see image on the right).
- Now, it’s time to let it harden! Your candle should be completely solid in approximately four hours.
- Light it up!
 While the glue dries/wick sticker adheres, decorate your jar. You can use any variety of jar decorations such as markers, paints, ribbons, gems, seashells, sticker labels, etc. to personalize your candle. Remember to position any 3-D decorations far away from where the flame will be. You don’t want anything to catch fire when you light your creation!
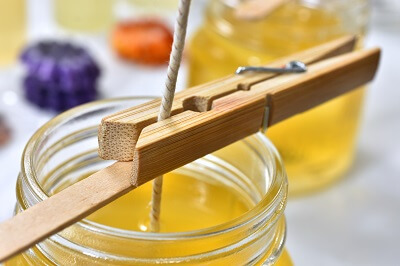 the wick shifts during the pouring process, move it back into an upright position. In order to keep this position during the setting process, use the craft stick and/or clothespin (see image on the right).
In Pinspiration’s main art studio, you can create your soy wax candle with ease. With a variety of wax color dyes, scents and all necessary supplies provided, Pinspiration has got you covered for all of your DIY candle needs – plus, let us worry about the mess and clean-up! All you need to think about is where you’re going to display it – book an appointment at pinspiration.com.