Not sure what to get the bride and groom? While you could just select a present off of the couple’s wedding registry, there is something so special about a gift made by your own two hands. Plus, there will be plenty of other guests who can buy them a set of plates or a toaster oven. Here are our top five favorite DIY wedding gift options that your newlyweds will forever cherish:
1. Decorative Wine Glasses
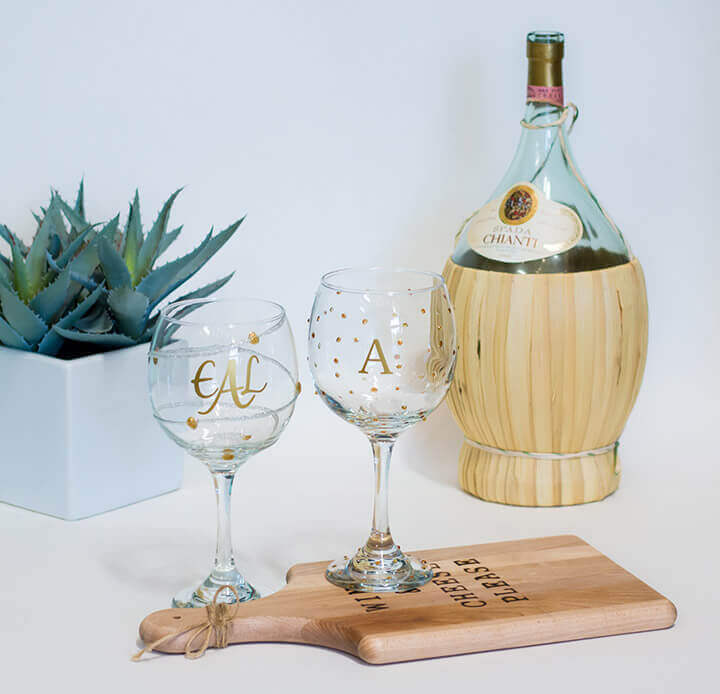
Begin your craft by selecting your design. You can decorate the glasses with the couple’s wedding date, monogram the bride and groom’s initials or with a “Mr.” and “Mrs.”, or simply cover with hearts.
After completing your design with the paint and paintbrush, let the paint completely dry. Reminder: some enamel paints need to oven cure at home before washing. Read the paint’s instructions to see what your specific paint requires.
To make this gift even better, you can pair this DIY with their favorite bottle of wine.The bride and groom will be constantly reminded of your love every time they pull out these glasses to celebrate their future occasions.
2. Heart String Art Sign
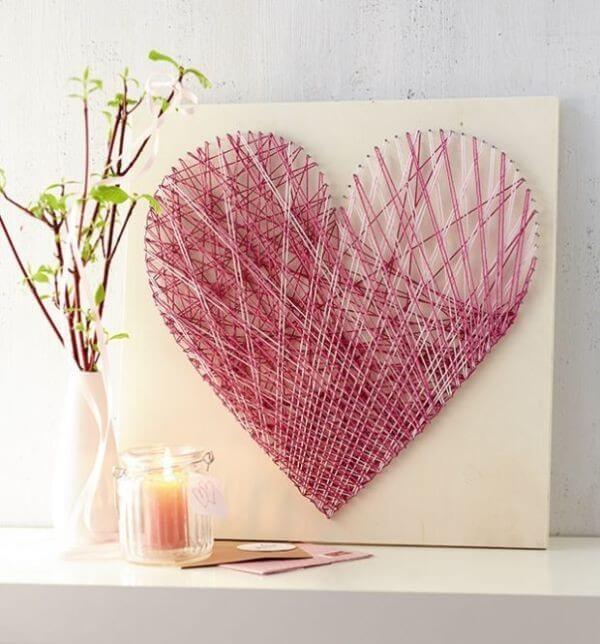
Gift the newlyweds a piece of string art to decorate their home – it’s guaranteed to pull at their heartstrings! To create this heart sign, you will need a wooden board (we recommend 12″x12″ and about 1 inch thick), paint or stain, 1-inch nails, a hammer, and embroidery thread.
Fist, paint, stain, or decorate your board base as desired. You may also choose to leave it as unfinished, plain wood to give it a rustic feel and let your design stand out. We recommend keeping the base simple.
Once finished (and completely dry), hammer your nails into the board in the shape of a heart (tracing the heart shape in pencil first helps!). Next, take your embroidery thread and begin to wrap and wind it around the nails. Feel free to switch between thread colors such as a variety of red and pink shades. Make sure to keep crossing the string from nail to nail until there is no awkward gaps or spaces. Finish off by tying the string around one of the nails and hide the knot. This gift can be easily hung or leaned against a wall to bring a little love and warmth to their space.
3. Wedding Christmas Ornament
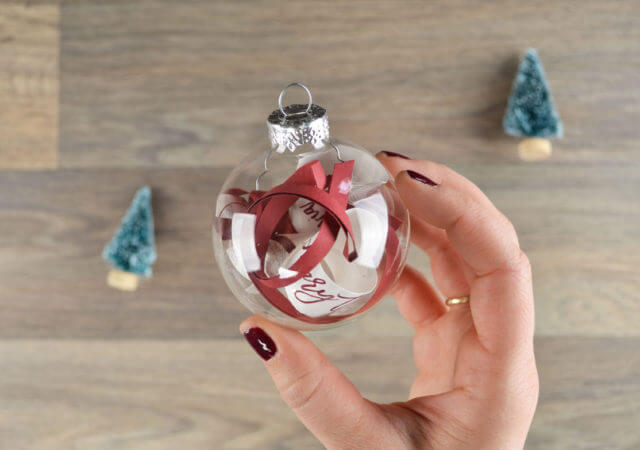
Help the bride and groom start their very own Christmas ornament collection with this unique wedding present. All you need to make this DIY is a plastic/glass craft ornament, scissors, their wedding invitation, a pen, and any ribbons or embellishments you like.
To begin, take the wedding invitation and cut into thin, horizontal strips (about 1/4″ to 1/2″ thick). Ensure you cut the strips so you can still read the lines of the invitation. When cutting the strips, specifically look for the more meaningful text: date, location, names of the bride and groom, etc. Additionally, feel free to cut any strips from the envelope or its underlay for some pops of color.
Next, curl the strips of paper by wrapping them around a pen. Wrap the strips flat along the pen with the text is facing outwards. Hold the curl for a few seconds and then slide the strip off the pen. Once all your paper is curled, take off the ornament lid and put in the strips. You can use the pen to gently move the papers around so the important words and colors are visible. After you are satisfied with the arrangement inside the ornament, place the lid back on. Finish it off with any ribbons, charms or other embellishments on the outside. Gift individually or in a set.
4. A Year of Firsts Wine Gift Basket
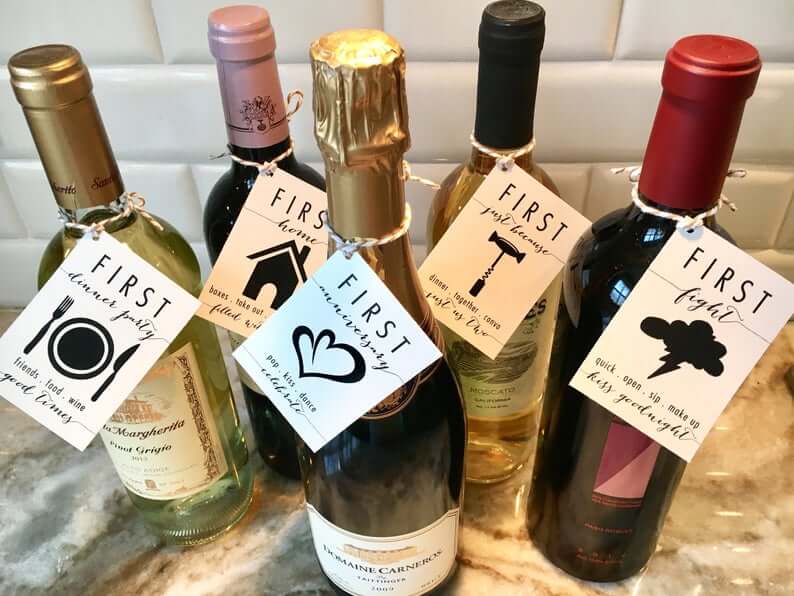
Looking for a way to make a gift basket more personal? This homemade present is the perfect last-minute gift for wine-loving newlyweds. To assemble, simply grab five or more of the bride and groom’s favorite wines, some cardstock paper, scissors, sharpie or paint pen, and some ribbon or string. Once you have all the bottles of wine, all you need to do is make the tags. Each wine is meant to be enjoyed with one of the couple’s “firsts” such as their first Valentine’s Day, first dinner party, first fight, etc. Just remember, you will need one tag per wine bottle, so adjust according to how many “firsts” you would like to include. To make each tag, take your piece of cardstock and cut or punch a hole in the top. Then, take your sharpie or paint pen to write whichever “first” that bottle represents. You can merely write the name of the “first” or you can also add some advice or a brief description of each event’s significance. After the ink or paint is completely dry, thread some ribbon or string through the hole and tie each tag onto the designated bottle of wine. You can display the wine in a literal basket or pack into a box or decorative bag. However, make sure to also include some tissue paper or decorative packing peanuts to prevent the bottles from clanging together or breaking during transportation.
5. Ring Holder Frame
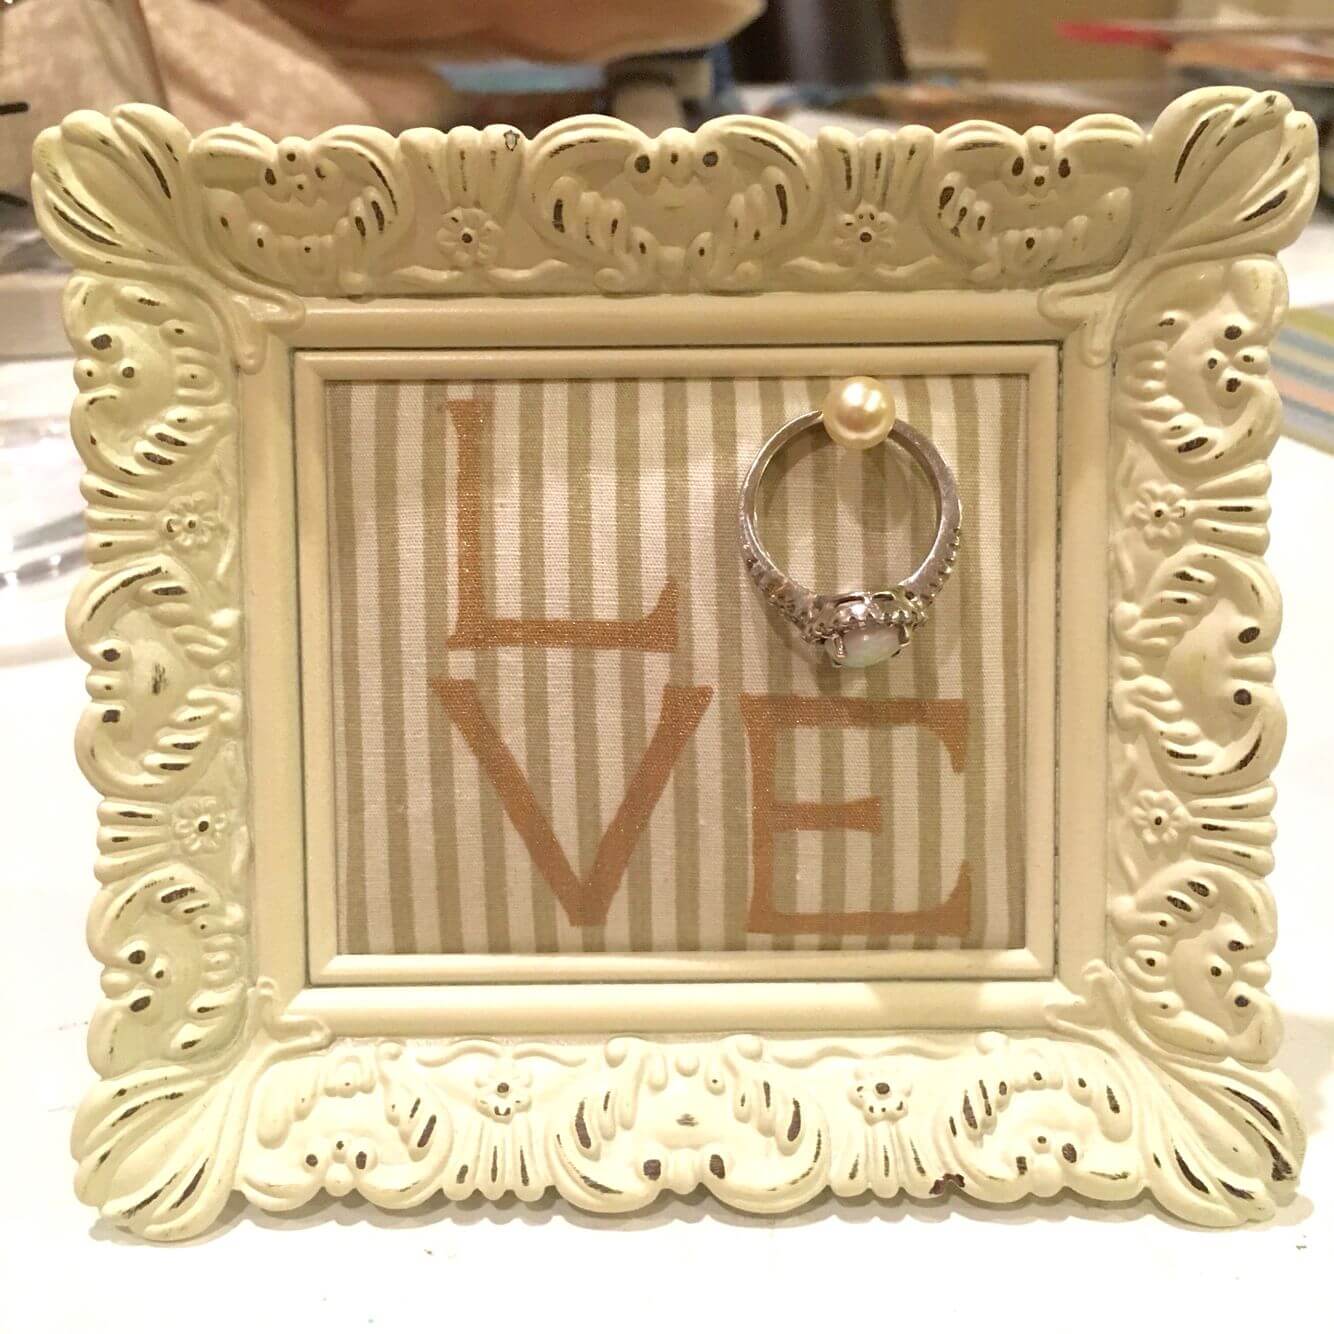
To start making your ring holder frame, remove the backing of your frame and take out any photo or paper inside. Then, take your decorative paper and cut it slightly larger than the frame’s backing. You can keep your paper plain or personalize it with a sharpie. For example, write out the couple’s names, their wedding date, or a cute word or phrase such as “love”, “Mr. and Mrs.”, “with this ring”, etc. After you are satisfied with the appearance of your background paper, place it inside the frame and reattach the backing. Lastly, take the thumbtack(s) and press into the board at your desired location. Make sure to push in the tack far enough for the ring to hang securely but not deep enough to damage the backing of your frame.
What craft are you going to make for the bride and groom? Be sure to post your wedding gift creations and tag Pinspiration on social media! We would love to see your creative spin on them.


